protecting trees for winter

Protect Trees and Shrubs in Winter

Protecting Trees and Shrubs in the Winter

protecting trees for winter

Winter sun, wind, and cold temperatures can bleach and desiccate evergreen foliage, damage bark, and injure or kill branches, flower buds, and roots.

Plants that are hardy in Zone 4 and 5 may be injured if winter conditions are abnormally severe or if plants have been stressed by the environment. Injury is more prevalent and more severe when low temperatures occur in early fall or late spring when there is little or no snow cover. Fluctuations in temperature can be extremely detrimental to plants throughout the fall, winter, or spring.

Sun-scald is characterized by elongated, sunken, dried, or cracked areas of dead bark, usually on the south or southwest side of a tree. On cold winter days, the sun can heat up bark to the point where the cambial activity is stimulated. When the sun is blocked by a cloud, hill, or building, bark temperature drops rapidly, killing the active tissue, causing the tree to crack.

Young trees, newly planted trees, and thin-barked trees (cherry, crabapple, honey locust, linden, maple, mountain ash, and plum) are most susceptible to sun-scald. Trees that have been pruned to raise the lower branches, or transplanted from a shady to a sunny location are also sensitive because the lower trunk is no longer shaded. Older trees are less subject to sun-scald because the thicker bark can insulate dormant tissue from the sun’s heat ensuring the tissue will remain dormant and cold hardy.

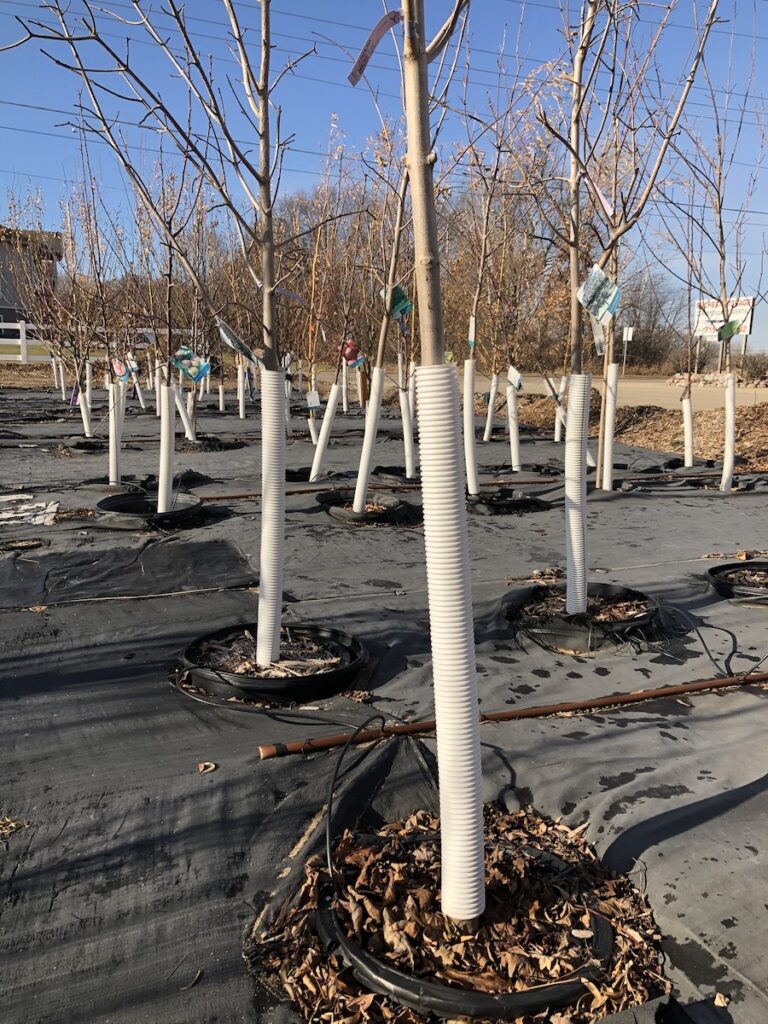
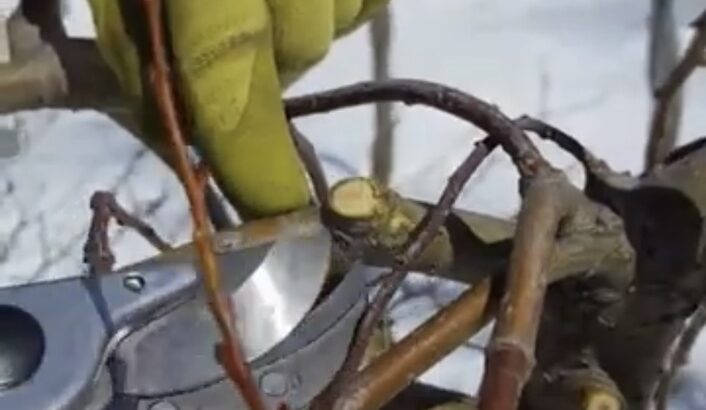
Sun-scald can be prevented by wrapping the trunk with a commercial tree wrap, plastic tree guards, or any other light-colored material. The wrap will reflect the sun and keep the bark at a more constant temperature. Put the wrap on in the fall and remove it in the spring after the last frost. Newly planted trees should be wrapped for at least two winters and thin-barked species up to five winters or more.

Evergreens

shrub covered with protective wrap for winter

Whether it’s a newly planted evergreen or one that’s several years old, preparation and protection are very important. Browning or bleaching of evergreen foliage during winter occurs for fours reasons:

  1. Winter sun and wind cause excessive foliage water loss, while the roots are in frozen soil and unable to replace lost water. This results in desiccation and browning of the plant tissue.
  2. Bright sunny days during the winter cause warming of the tissue which in turn initiates cellular activity. Then, when the sun is quickly shaded, foliage temperature drops and is injured or killed.
  3. During bright, cold winter days, chlorophyll in the foliage is destroyed. This results in a bleaching of the foliage.
  4. Cold temperatures early in the fall before plants have hardened off completely or late spring after new growth has occurred can result in injury or death.

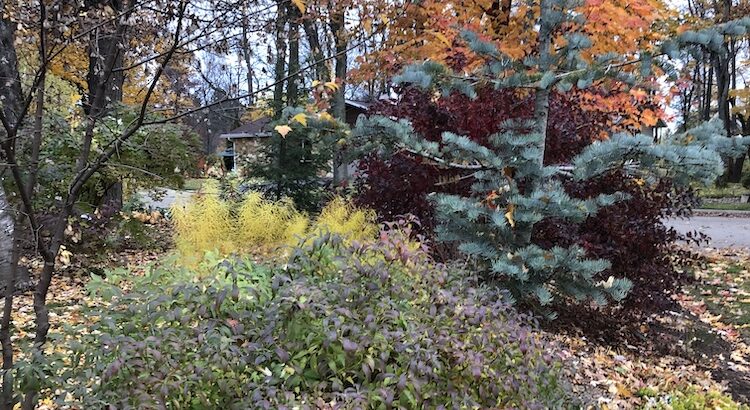
Foliage damage normally occurs on the south, southwest, and windward sides of the plant, but in severe cases, the whole plant may be affected. Yew, Arborvitae, Alberta Spruce, and Hemlock are most susceptible, but winter browning can affect all evergreens. New transplants or plants with succulent, late-season growth are particularly sensitive. 

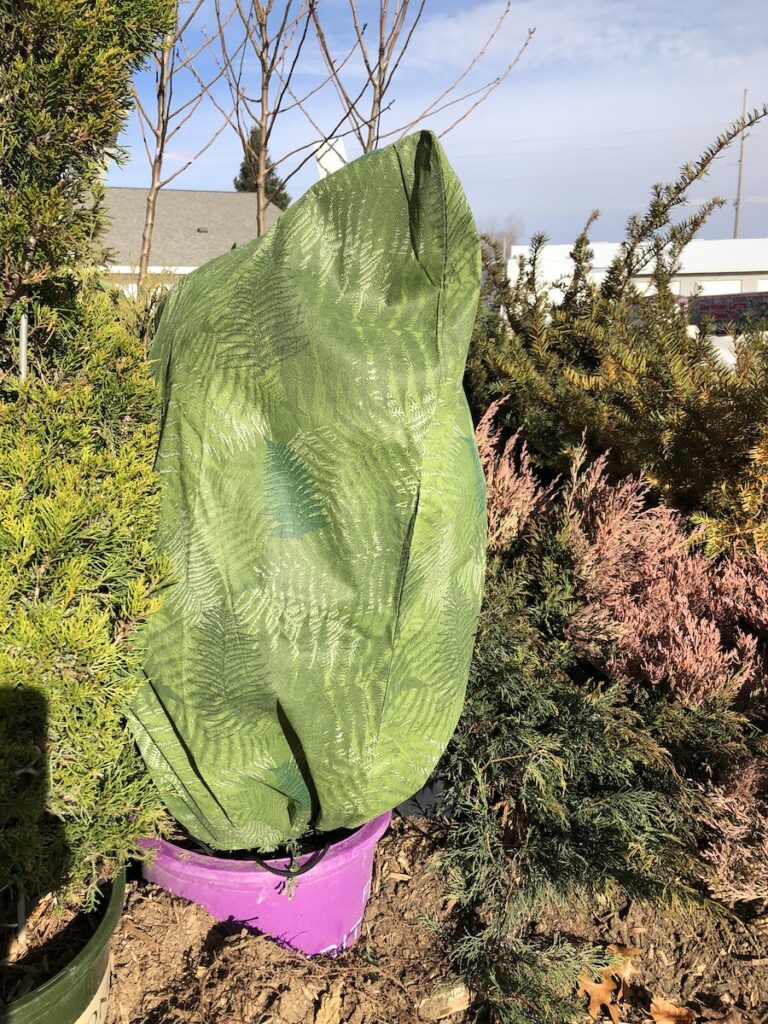
There are ways to minimize winter injury to evergreens including properly place your evergreens in the landscape. Areas in full sun in highly exposed areas are to be avoided. Protecting them from the elements, purchase winter protection bags or construct a barrier of burlap on the south, southwest, and windward sides. As well as keeping evergreens properly watered throughout the growing season and into the fall. Decrease watering slightly in September to encourage hardening off, then water thoroughly in October until freeze-up. Watering only in late fall does not help reduce injury. 

For more information visit: 

https://learningstore.uwex.edu/Assets/pdfs/A2414.pdf

https://hort.uwex.edu/articles/winter-burn/

Fall Cleanup

Summer is coming to an end, but that doesn’t mean that you have to put away your gardening tools! There are lots of things to be done in the fall to prepare your landscape for next season! 

1. Keep Up on Maintenance

Keep mowing your lawn until the first frost, and check the yard over for weeds. Remove the weeds as needed, so they won’t return in the spring. As leaves fall, rake them regularly to keep the grass healthy underneath. Leaves can smother and kill your grass if left on the lawn, so make sure removal is part of your fall schedule. Pruning is also an important part of fall cleanup. Remove any dead or diseased wood. Also remove any branches that might become a safety hazard when the snow and ice come!

2. Plant for Spring Color

Plant bulbs now for spring bloom! Many bulbs can be planted in the fall including tulips, daffodils, and hyacinths. When planting, make sure to plant only healthy bulbs! Any bulbs with soft or spongey feeling spots should be thrown away.

3. Prepare Your Deck or Patio

Remove furniture and store it for the winter. Before storing, clean the furniture properly. Then use a broom to sweep away leaves, needles, and other debris that can stain the surface of your outdoor area.

4. Care for Tools

Disconnect and drain hoses at the end of the season, then store them inside before winter. Sharpen or replace blades on any tools that cut or dig. Always make sure to wear heavy gloves to protect yourself while sharpening. 

5. Perennial Cleanup

Perennial cleanup is a personal preference. Some people like seeing perennials standing during winter, others don’t. If you do want to remove them, wait until after the plants have gone dormant, and cut down to within 2-3 inches of the crown. If you had perennials that were bothered by foliage diseases during the growing season, removing the old foliage can be beneficial. This reduces the amount of inoculum that is present to re-infest next year’s growth.

white-tailed lowering head to eat

Deer Proofing your Landscape

Deer Proofing Your Landscape!

Deer damage home landscapes by feeding on garden and landscape plants, rubbing their antlers against trees, or scraping the soil around trees.

There are several options to reduce the damage: grow plants which deer find unattractive, fence the deer out, or use repellents. It should be stressed that hungry deer will eat almost anything.

Young, tender plants are generally more likely to be damaged than older, tougher plants. Don’t mix plants deer prefer among those they dislike. They’ll trample the plants they dislike to get to those they prefer.

The following lists attempt to ascribe preference ratings to some common landscape plants:

Generally Preferred PlantsSometimes EatenGenerally Disliked
Apples


Arborvitae/white cedar

Arrowwood Viburnum

Birch

Daylilies

Dogwood

Euonymus

Garden lilies

Hostas

Hydrangea

Impatiens

Linden/basswood

Yews

American highbush cranberry


Honeysuckle

Douglas fir

Forsythia

Hazelnut

Hemlock

Juniper

Maple

Mountain ash

Roses

Spruce

Sumac

Wayfaring Tree Viburnum

White Fir

White Pine

Young fruit trees

*Plants with thorns such as:


Barberry,

Common buckthorn

Russian olive

Balsam Fir

Anthony Waterer spirea

Lilac

Nannyberry Viburnum

Potentilla

Ural Falsespirea

Male deer damage young trees by rubbing and scraping against them during the mating season, in an attempt to show their dominance. Male deer will also paw the soil around trees and urinate on the cleared area beneath an overhanging branch. The deer will chew and rub his scent on the branch, often breaking it. Pruning trees to remove any branches lower than 6 feet from the ground may help.

Barrier fences can reduce the number of deer which enter the area, though not 100% effective. For a small garden patch, use a 4-foot-high fence, or enclose the area with snow fence as deer avoid small, penned-in sites. For a larger lawn, a fence made of wire angled away from the yard creates both a psychological and physical barrier. Deer hesitate to jump over something in which they fear becoming entangled. The fence should reach 6 feet high and have a 30-degree angle to be effective.

Two basic types of deer repellents are available: contact repellents (applied to plants causing them to taste bad) and area repellents (placed in problem area and repel due to their foul odor). 

For more information visit https://learningstore.uwex.edu/Assets/pdfs/A3727.pdf & https://learningstore.uwex.edu/Assets/pdfs/G3083.pdf 

Hydrangea

Hydrangea Care

Hydrangea Care

Japanese Beetle

Japanese Beetles, Popillia japonica

Japanese beetles are a major pest of gardeners every year. They appear in late June to early July, and can be seen until September. They feed on foliage or flowers, and are a major pest. Often skeletonizing ornamental trees and shrubs, and garden plants. The beetles are around a ½ inch long, and are shiny green metallic. They have coppery brown wing covers, and six white patches along the side of the body.

Control

Cultural: Only a few insects are needed to do a great amount of damage. In a small gardens it can be practical to remove the beetles by hand from plants. These should be crushed or destroyed, as the beetles are strong fliers and can reinvade from surrounding areas. Placing cheese cloth or other light covering over the plant before infestation can work as a preventative.

Chemical: Several insecticides are labeled for use against adult Japanese beetles. Always follow label directions, and treat foliage and flowers thoroughly. For optimal control, apply in the afternoon when beetles are most active. Often you need to apply every 5 to 7 days for several weeks. Recommended synthetic insecticides contain carbaryl, acephate, cyfluthrin, rotenone, or bendiocarb. Systemic insecticides, which are applied in spring and taken up by the roots, work fairly well for killing Japanese beetles eating foliage. However, systemic insecticides don’t translocate well into the flowers so aren’t helpful in reducing flower damage. On the organic spectrum, Neem oil (azadirachtin) and spinosad (spinosyn) are both effective organic insecticides for Japanese beetles.

For more information visit https://hort.uwex.edu/articles/japanese-beetle/

Rose Chafers

Rose Chafer, Macrodactylus subspinosus

Rose Chafers are out in full swing right now, munching on, and often times, skeletonizing many landscape and garden plants. Adult beetles are most attracted to flower blossoms, particularly rose and peony. Damage often occurs in June, and tends to be most severe in areas with sandy soil, which is preferred by the larvae. Heavy or clay soils hamper growth and development of the beetles. Listed below are some methods of control for these pesky insects!

Control

Cultural: Only a few insects are needed to do a great amount of damage. In a small gardens it can be practical to remove the beetles by hand from plants. These should be crushed or destroyed, as the beetles are strong fliers and can reinvade from surrounding areas. Placing cheese cloth or other light covering over the plant before infestation can work as a preventative. 

Chemical: If the insect is present during the period of damage, acephate, bifenthrin, carbaryl, cyfluthrin, deltamethrin, imidacloprid, lambdacyhalthrin, and peremethrin are the most effective ingredients in chemical controls. For large populations, two to three applications may be necessary. Re-infestation can readily occur during heavy flights, and insecticide applications may not completely protect the plants. Be certain to read and follow all precautions and instructions on the pesticide label before use.

For more information visit https://hort.uwex.edu/articles/deciduous-tree-and-shrub-disorder-skeletonizing-by-rose-chafer

Houseplant & Succulent Care

On cold winter days, houseplants can help raise our spirits. Inaddition to being beautiful, research has shown that they help clean
indoor air, and have therapeutic effects on people of all ages. They
also help satisfy the urge for those people that can’t wait for nextspring to begin! To keep your houseplants healthy, there are a few
different things to consider; light, temperature, water, humidity, and
nutrient requirements.
Light will be the most limiting factor to indoor growth, cloudy days,
few hours of daylight, and the low angle of the sun all play a role in
this. Place plants in south facing windows to maximize light levels.
Simple fluorescent bulbs also can be beneficial, providing extra hours
of light in the evening.
Temperature is another consideration when it comes to houseplants. Most plants prefer it to be between 65
and 75 degree F, with night temperatures about 10 degrees cooler. Keep plants away from cold drafts, such as
doors and windows. Also avoid hot and dry areas such as heat vents.
Don’t water on a schedule, only when your plant needs it. Dig your finger into the soil to the second knuckle, if
it feels dry, it is time to water. Water thoroughly until water comes out of the drain holes on the bottom. Do
not allow plant to sit in a saucer full of water.
During the season of indoor heating, homes often become quite dry. Grouping plants together, and using a
room humidifier can raise humidity. This prevents moisture loss, and prevents you from watering more often.
During the winter when light levels are lowered, plants are limited in their growth. Be careful not to over
fertilize your houseplants during the winter in an attempt to encourage growth. Always mix fertilizers at ½ the
recommended rate on the label. This will prevent burn and salt accumulation in your container.
 
Succulent Success
Succulent gardens are currently trending as one of the most popular forms of indoor gardening. Why is this?
With their thick stems and fleshy leaves, they are able to tolerate the low humidity climates of homes and
offices with grace. They also have strong leaf shapes and eye catching foliage! To start a succulent garden, you
only need a few items, some sunshine, and a sense of creativity. Here are a few basics to get you started on
your path to succulent success!
Succulents like to stay drier than most other houseplants, they can get root rot easily, so be sure not to
overwater them. Over watering is the most common cause of failure with succulents. When planting, many
people put pebbles or pea gravel in the bottom of the pot, this will help increase the drainage. It is also
recommended that you use a high porosity soil. There are several potting mixes that are specifically
designated for growing succulents.
Sunshine is essential for succulent success, they crave the brightest light possible, especially in our northern
climate. Place plants near a south or east facing window. During the warmer parts of the year, you can move
your garden outside, choose a sheltered area that still allows sunlight to shine down on them!
You may want to fertilize your succulent garden, but be careful! Succulents can usually only tolerate about half
the fertilizer rate that standard houseplants can, so use a fertilizer that is intended for succulents, to prevent
them from burn. Succulents grow the most during the spring and summer, it then slows in fall and winter is
generally a time of rest. During the growing seasons, succulents can be fertilized 3-4 times, then little to not at
all during the winter.
With endless types of succulents to choose from, it may be difficult to choose! Echeveria is known for its’
rosette forming leaves and many colors. Aloe can make a great accent with its intensely green coloring and
strong lines. Sempervivum (“Hen and Chicken”) spread easily and have tightly packed leaves, making it a great
selection. Kalanchoe comes in a variety of colors and shapes, making it versatile to tuck into any garden.
Choose one, or a few, to make a stunning impact of color and style in any space!